Overview
What is a store?
How do I become a vendor on Marketplace LOBBYNOIR?
How do I create my store?
How to add products?
- Basic details
- Choose a category
- Product Type Selection
- Activating variations
- Create Attributes
- Changing and recording variables
- Inventory and variants
- What is SKU?
- Activate product inventory management
- Downloadable product
- Shipping
- Tax
- Other options
- How do I handle orders?
- Order notification
- Order list
- Order status
- Order note
- General details
- Download permissions
- Tracking shipments
- How to manage coupons?
- Create coupons
- Discount on the product
- Percentage discount
- Show the coupon on the storefront
- How to track reports?
- Sales per day
- Best sellers
- The best incomes
- Statement
- How do I manage reviews/comments?
- Changing reviews
- Mark as Spam
- Delete reviews
- Cancel notices approval
-
How do I withdraw my earnings?
- Withdrawal methods
- Notification of approval
- How do I manage customer return requests (RMA)?
- Customer’s RMA option
- Ask for a warranty
- How to manage followers?
- How do I provide customer assistance?
- Open a new support section
- Show your existing tickets
- Notification
1- What is a store?
A store is the place where vendors present their products in an interactive way. It’s their trading place and it displays contact information, store location and any other relevant information. Sellers will access their store through their dashboard.

2- How do I become a vendor on Marketplace LOBBYNOIR?
You can register as a vendor by simply clicking on the registration button and submitting basic information. Go to Login/create an account and complete the register section. The last field “Payment Email Address” only needs to be completed for referrals.

3- How do I create my store?
The store banner represents the concept of your products. You should use an attractive visual image to engage customers. You can insert your image from the seller’s dashboard → Settings → Store page. If you choose too, you can also display your business contacts such as your phone number, email address, store location information, biography and map.

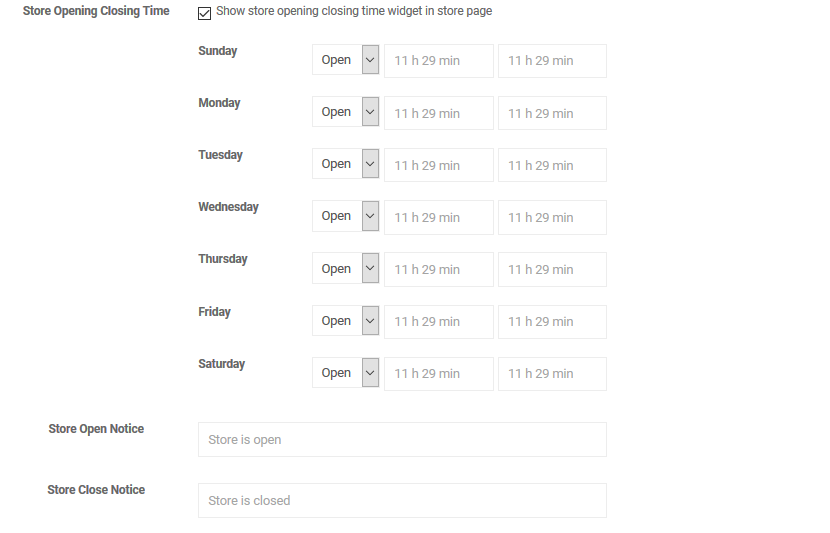
With Marketplace LobbyNoir, you can set the opening and closing hours of your online store. This feature is available in the seller’s dashboard → Store → Settings. Scroll down to find the widget for store opening and closing times. To set each day of the week, select the time from the Open or Close drop-down list. If Open, select the duration in the digital fields.
Click Update settings.
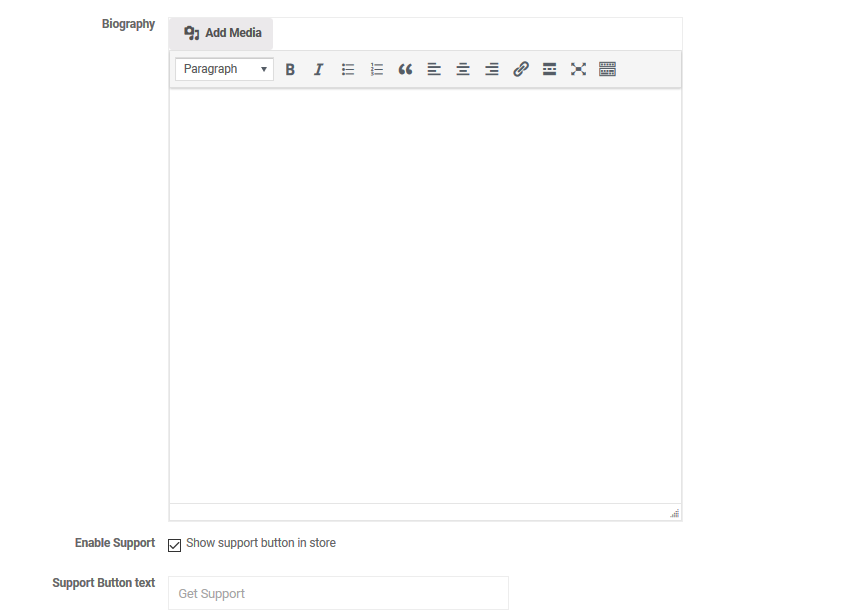
With Marketplace LobbyNoir, sellers can complete their biography.
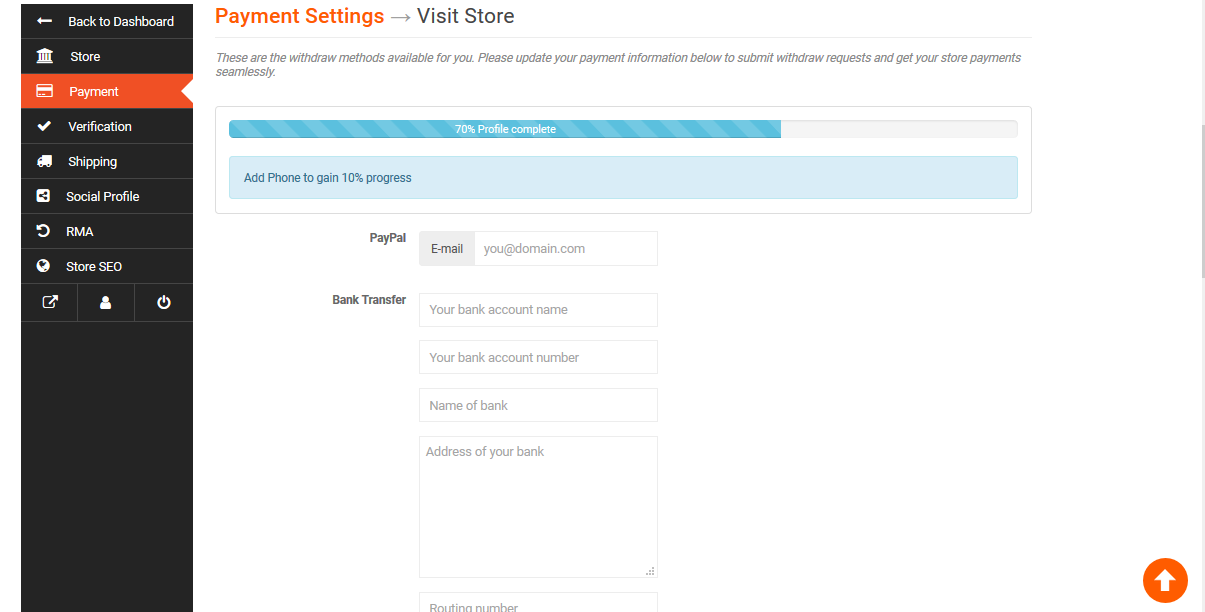
Payment settings
The seller can choose his preferred payment method for the store. For bank transfers, simply add the bank account name, account number, bank name, address and swift code. Now save the settings by clicking on the Update settings button.
Shipping settings
This page contains delivery settings, fees, shipping costs and your store refund policy. You can turn delivery on/off for your products. You can also change the shipping costs when creating or changing a product insertion. The vendor has the option to choose two shipping systems:
- Shipping by zone
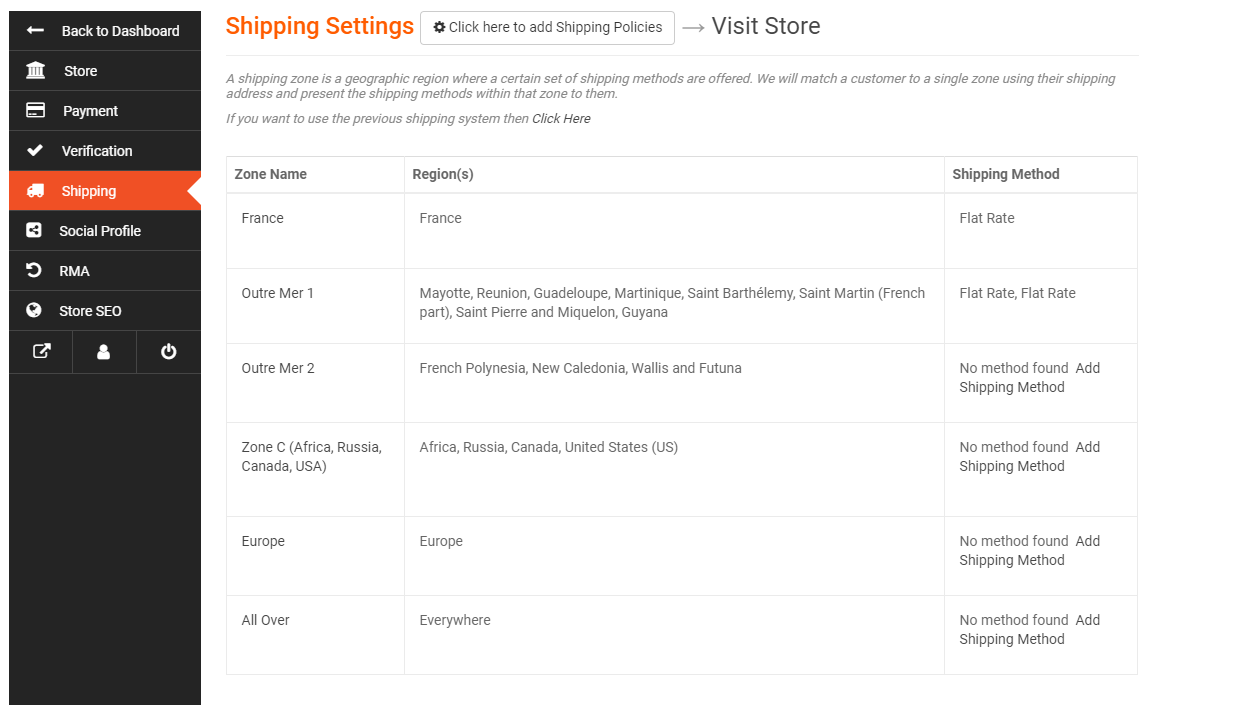
To customize settings by zones, click on “Zone Name”, edit, add and/or change the shipping method if applicable, indicating the rate you wish to choose and its cost.
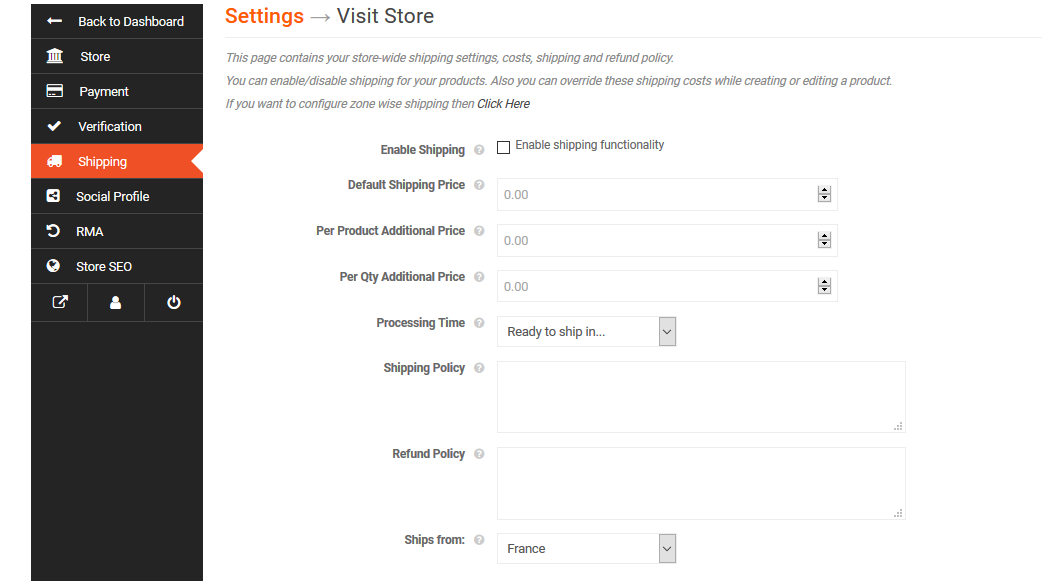
- Customized shipping system, click on “Click Here” in Italic

It will take you to the display below. Just fill in the fields as applicable. In the last field, you can choose the countries it applies to.
Social media
Social media can increase a customer’s confidence in your products. Consider adding your social media links for better user interaction. You can link all social media sites to your store from this page. Marketplace LobbyNoir has a simple display and an easy-to-link format to store settings for vendors.

RMA
Here you can add the return policy and set up the warranty terms of your products. We strongly urge you to take time to do so, this is a mark of trust and organisational management to reassure your customers.

SEO in-store
Listing your store can help you increase your store’s traffic. You can set your SEO title, meta-description, keywords, meta-keywords, Facebook title, description, image, Twitter title, description and image.

4- How to add products?
Go to the vendor dashboard. Click Products in the menu on the left, then the Add new products button in the top right corner. This will open a new window where you can add a new product very easily by providing only the most important details.

Basic details
Common information about a product is the title, price, description. The discounted price is optional. You can even plan discounts ahead of time. You can enter a start and end date to apply automatic discounts to your product. The categories are created by the Lobbynoir team. If you would like us to create a new category, you can write to us at infos@lobbynoir.com. The vendor can only select them from the dashboard as allowing vendors to create categories can create duplicates.
Choose a category
Sellers must select the category from the drop-down list of categories, it is possible to choose several categories in line with your product. The seller has the option to create keywords or use the available keywords.

After providing all the required information, click Create & Add New Product. The product will be created and you will be redirected to “Products” where you can add more information. If you would like to add another product immediately, click “Create and Add New”.
Once you’ve been redirected to “Products”, you can select a product type. You can select a simple or a variable product.
Selecting the type of product – Simple product
These types of products are simple and have no variable. These are unique products, which do not require additional information to define variables.

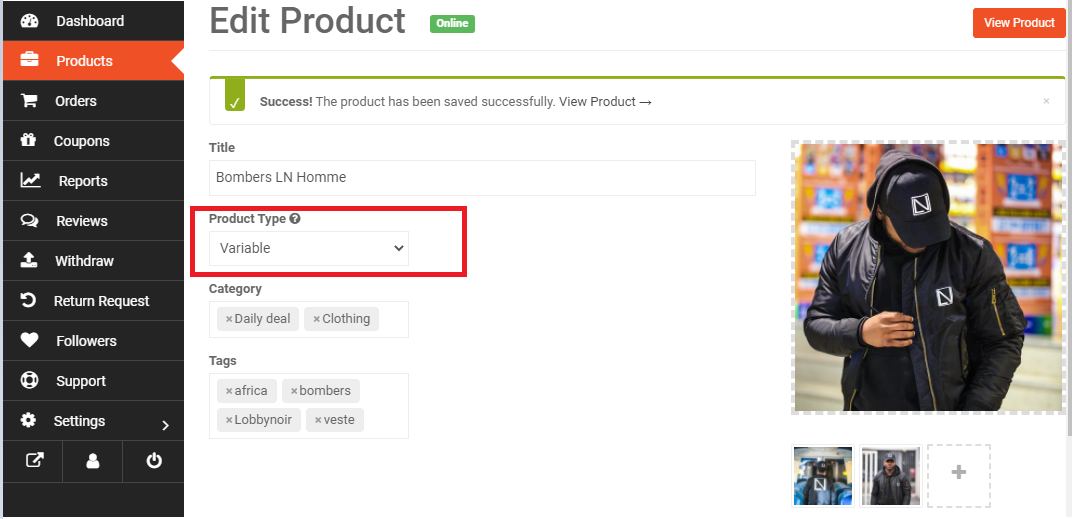
Product Type Selection
– Variable Product
A variable product is a product that has different types of variables. For example, you may want to sell a dress available in 3 different colors and sizes. This option will allow you to add the colors and sizes you need. You can add variables from the material used to the sewing style.
To create a variable product: select Variable from the Product Type drop-down menu. Now provide the product category and tags so that customers can easily find your product in your store.
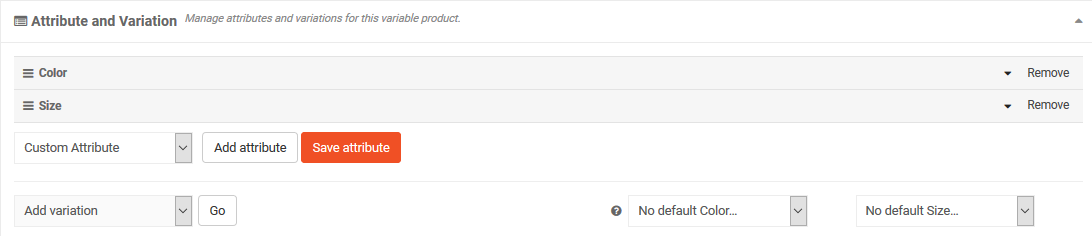
Activating variations
Now scroll down to the Attribute – Variation section from which you can manage different variations and attributes for your variable product.
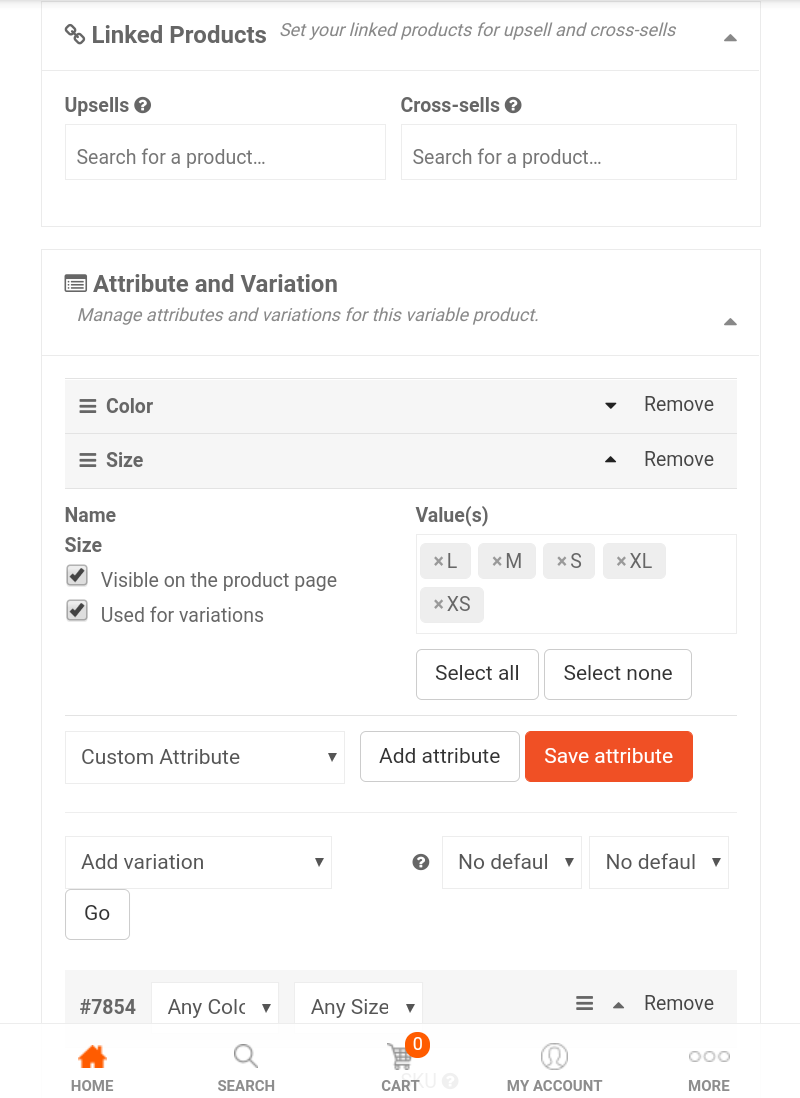
e. Create attributes
You can use the available attributes or create a new attribute by selecting ‘Custom Attribute’ and clicking ‘Add Attribute’. Now provide the attribute name and their values. You can create more values by entering ”’character’ after providing a value.

Now, to create new variables of your product from the value provided, click on ‘Add Variable’ and select ‘Create variables for all attributes’. You can also create unique variables based on your needs by selecting ‘Add a variable’. After choosing your option, click ‘Go’ and it will automatically generate variables for your attributes.
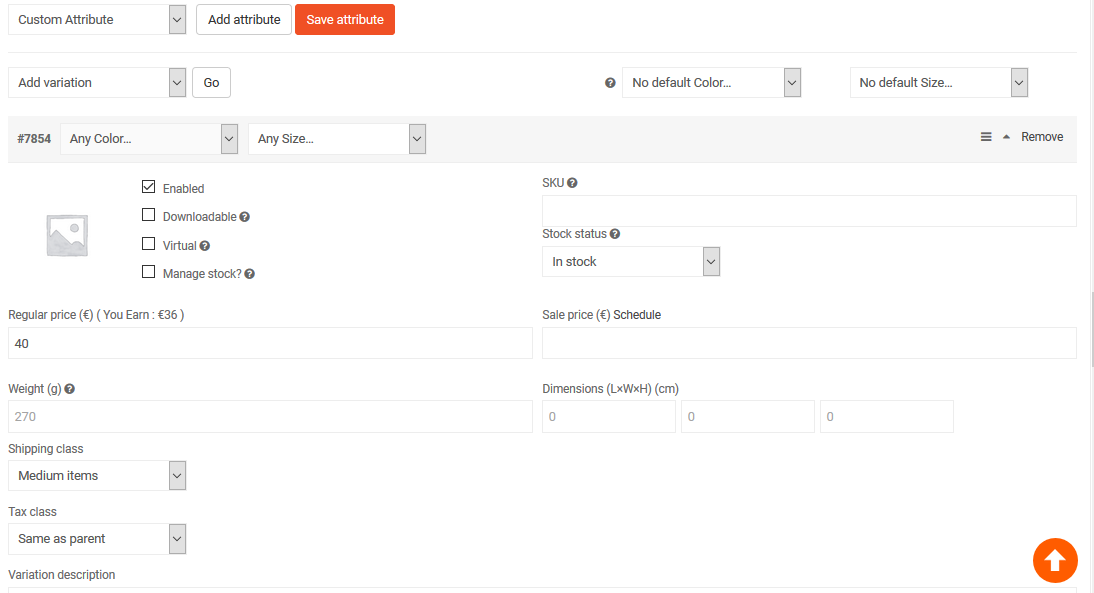
f. Changing and recording variables
You can also customise variables. Click on the variable you want to change. This will open the SKU description and options for this variable.

Enter the price, dimensions and SKU of your variant.
You can also include the shipping class, the tax class and the description of the variant. You can also remove any variants you don’t have for this product. Once you’ve finished editing the variables, you can save the variation by clicking the Save Variations button.
You can now include all discount options for your product. On top of that, you can include other options. There are options such as product status, visibility, purchase note and product reviews. After completing all the steps, click the Save product button at the bottom right to create your variable product on your Shop.
g. Inventory and variants
This section contains some more complex information. None of these fields are mandatory. If you don’t need to add the quantity in stock and you only have simple products, you can totally ignore this section.
But if you’re creating a downloadable product or selling a dress or t-shirt, which has several sizes, you should read this section carefully.
h. What is SKU?
SKU stands for Stock Keeping Unit. It must be a unique set of characters that does not correspond to any other product.
i. Activate product inventory management
Let’s say you have 10 pieces of a product and you don’t want to receive any more orders once you’ve made 10 sales. If you activate inventory management and enter 10 in the quantity field, after selling 10 units, this product will display a message indicating that all quantities are sold and that there is no stock left.
But you may want to pre-order before your next batch arrives. This allows you to continue placing orders even if the product is out of stock.
j. Downloadable product
If you sell photos, music, software or any other digital product, this is the option to use. If you click the Add a File button, three more fields will be added.
The name field defines the name of the downloaded file. We let you define this because you could name the original file by something like “new-album-updated-jan-20.zip” and you want the user to download the file as a “new album”. This option will be useful for you to better organize yourself. If you stream the files from your own site, you can click to choose the file and select. But you can also serve the file from Dropbox, Google Drive or another file hosting site.

k. Shipping
You can leave all settings as such as none of the fields are mandatory here if you have already set up your delivery charges previously in your dashboard.

l. Tax
Here, the seller can only select the pre-defined tax classes according to the status and taxation of your company.
m. Other options
Visibility: The visibility option defines product privacy. By default, “Catalogue and Search” is selected. But if you want the product to appear only on the category list page, search results, or you want to list it as a hidden product, you can select the option, respectively.
If you select an option other than Catalogue and Search, the product will not appear on the site other than the store page.
Purchase Note: If you want the customer to receive a personalized message right after the purchase of the product, you can tick the box.
Notice: If the seller does not wish to send notice of the product to customers, he can turn it on or off.

5- How do I handle orders?
a. Order Notification
The seller will receive an email notification every time their product is purchased.
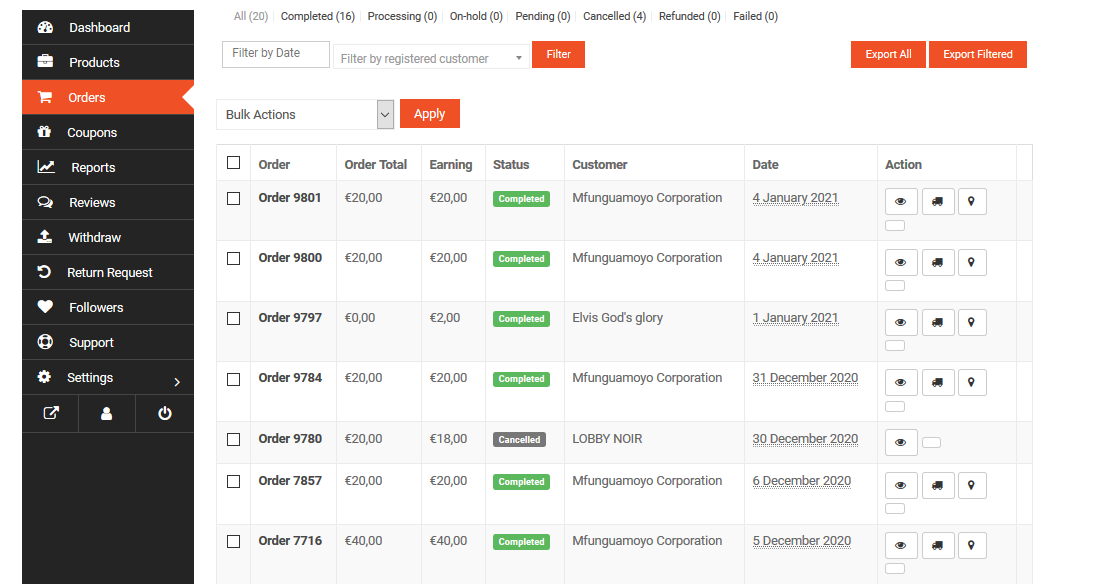
b. Order list
The order page shows the detail of the order in the list. This page shows the order number, the total amount of the order, the amount earned, the status of the order, the customer’s details, the date of the order and the action of the order. You can view the order in more detail, manage the status of the order, and delete the order.
You can filter orders by date. In addition, you can also export the list of orders.
c. Order Status
The seller can view and process the order status from the order list.
d. Order note
The seller can add a note to an order and set the note for the customer or a private note. For the customer note, the customer will receive an email notification for each note added. For the private note, only the seller will receive the notification via email.
Click the “Action” button

e. General Details
In this section, you will be able to see the status of the order, the date of the order, the amount of earnings from a specific order, the customer ID, the email, the phone number, etc.
f. Download permissions
The vendor can manage download permissions if the product is downloadable. It can add or delete downloaded files and control access to download the file.

g. Tracking shipments
You can track the shipment of the product you are selling. Go to your seller dashboard → Orders → Click on the order you want to add a follow-up. At the bottom of the order, you’ll find a button called “Tracking Number.”

When you click on it, a new window will appear with three options. You can provide the name or URL of the shipping provider, the tracking number and the shipping date. After providing the information, click on ‘Add Tracking Details’.

Order details will be updated and a new order note will be added containing the follow-up details.
6- How to manage coupons?
Coupons can be a good way to retain your loyal customers and win new customers.
To create a new coupon for your store, go to your dashboard and select -> Coupons. Then click on ‘Add new coupon’.

a. Create coupons
Then fill out the fields of the form you get after clicking ‘Add new coupon’..
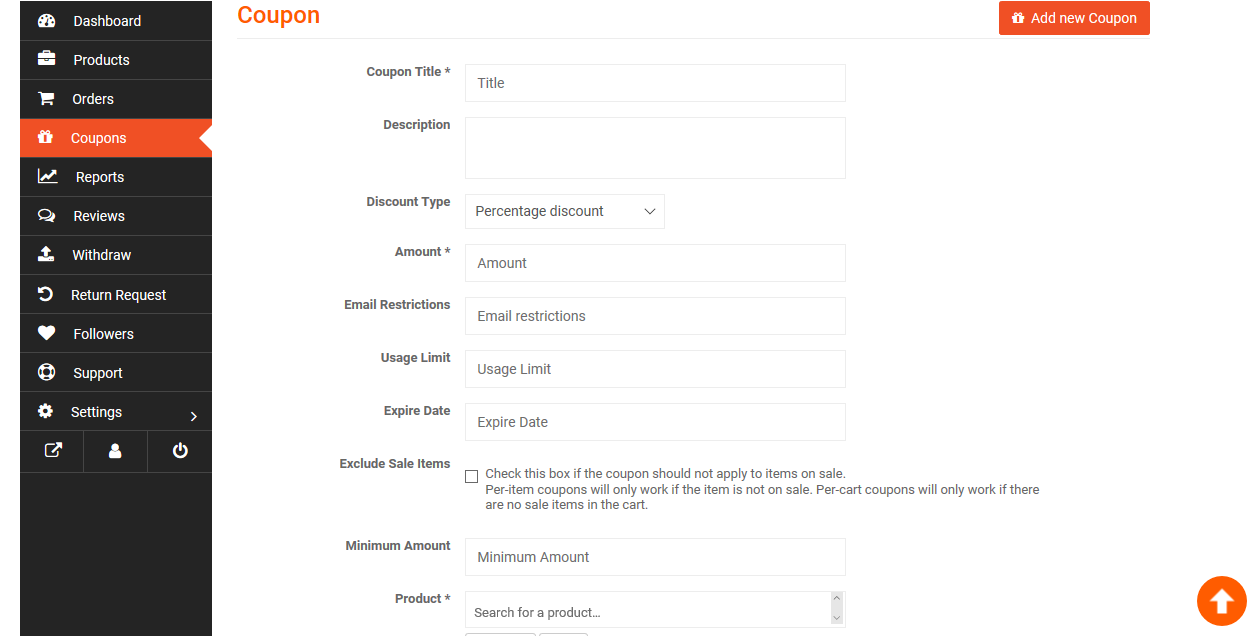
The fields included are:
Coupon title: Add the name you want to give to your coupon.
Description: In this field, you can add the subject of the coupon.
Discount type: This drop-down list allows sellers to choose between the percentage and the fixed amount of your discount.
Amount: add here the amount of the discount (percentage/fixed).
Email restrictions: Choose to limit the coupon to certain emails if you wish. If you insert an email, only customers with this email will be able to use the coupon.
Use limit: Add the number here if you want to limit the use of the coupon to a certain amount.
Expiration date: If you want the coupon to remain usable for up to a period of time, select the expiry date from here.
Exclude items on sale: Sellers can check this box if they want to disable items on sale from the coupon offer.
Minimum amount: Select the minimum amount that an order must represent for a customer to claim the coupon.
Product: Sellers can select one, several or all the products they sell in their respective stores.
Exclude products: Suppliers may also prevent the coupon from applying to a particular product or several products.
View in-store: Check this box to see the discount code on your storefront.
b. Discount on the product (fixed amount)
The fixed-amount discount coupon means that when a customer uses the coupon, they will get the fixed amount discount mentioned on the coupon. Regardless of the total amount of his order, he will receive the same amount of rebate.
To use this option, select Product Discount in the Discount Type drop-down list.
This will also appear when you display all your coupons on the seller’s dashboard as a fixed amount under ‘Coupon Type’.
c. Percentage discount (%) Product
Percentage discounting of the product means that when a customer uses the coupon in their order, they will get a discount based on the total amount of their order. He will get a discount of the percentage mentioned on the coupon on his total order.
To use this option, select % off the product in the Discount Type drop-down list.
This will also appear when you view all your coupons together from the seller’s dashboard as a percentage under ‘Coupon Type’.
d. Show the coupon on the storefront
You can display the coupon on the storefront by checking the last option on the Add a Coupon page.

7- How to track reports?
Overview
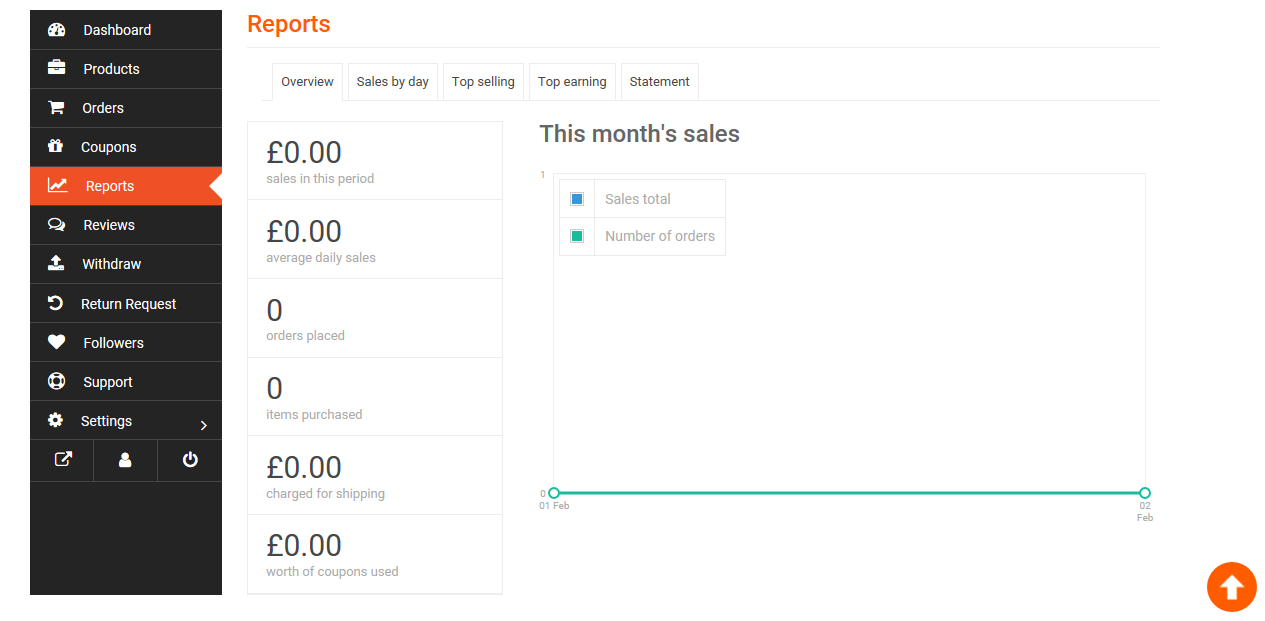
The sales preview appears on the report page. At the top of the report, there are options for the seller to view the full overview of their sales report, the preview of the day, the best-selling product report and the report on the highest-paying products.
a. Sales per day
The seller can view his one-day order in this option. The report shows the complete one-day sales, average, total orders, total number of products purchased, coupon details and one-day sales chart.
b. Bestsellers
In this option, the seller can see its best-selling products and its total number of sales with the sales ratio chart line.
c. The best incomes
The seller can see his best-selling products total amount of sale in this option, it is possible to display the best revenue manually by date.
d. Statement
The statement will show your transactions by analyzing their debit-credit aspects. It will also show the date of the transaction, the transaction ID, the type and balance or transactions.
8- How do I manage reviews/comments?
Overview
Sellers can view all customer reviews of their products from the Sellers Dashboard page > Reviews.

With this feature, sellers can moderate customer reviews. Sellers can:
- Approve or decline notices
- Mark a review as spam
- Send a notice to the trash can
a. Changing reviews
Sellers can no longer change customer reviews.
b. Mark as spam
If the seller does not wish to post a review, they can mark these reviews as spam by checking the review and selecting it as “Mark as spam” in the selection box.
c. Delete a review
If the supplier wishes to remove or bin a review, he can mark this notice as “garbage” by selecting the option “Trash” in the selection box.
d. Cancel notices’ approval
If the seller wishes to refuse a review that has already been validated, simply click on the “Cancel Approval” option.
9- How do I withdraw my earning?
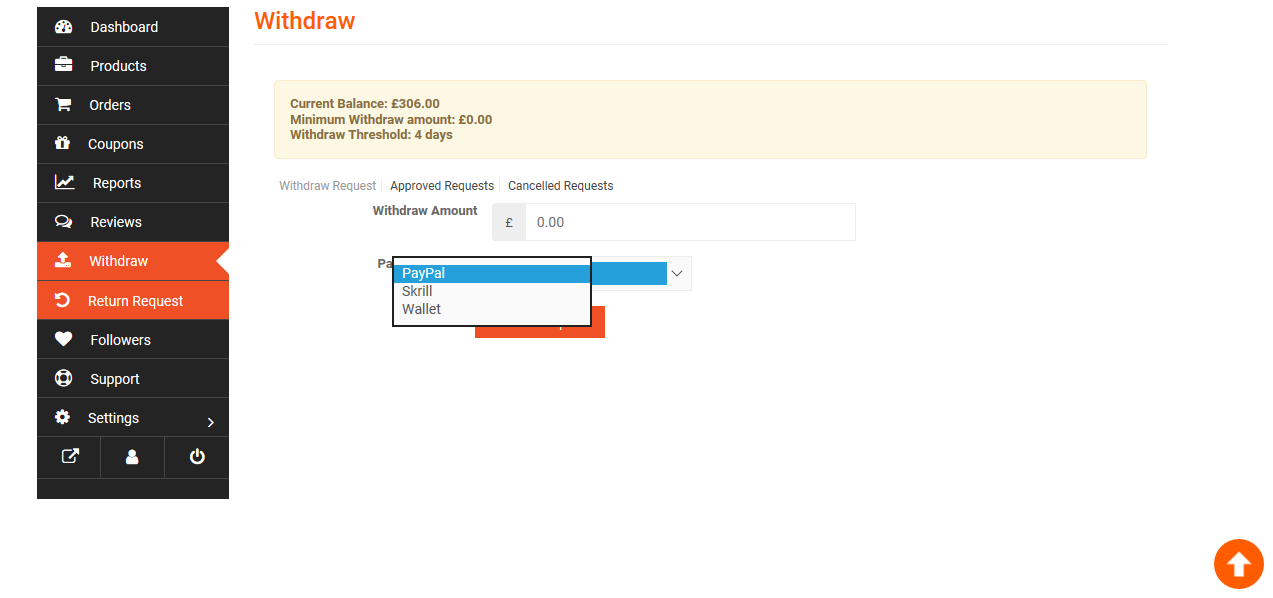
The seller can see his total earnings on the ‘withdraw’ page.

a. Withdrawal methods
The seller can select his withdrawal method from the drop-down list of the withdrawal page.
Funds are available for withdrawal a minimum of 4 days after the seller’s purchase is shipped on the condition that the client has received the item and that the vendor updated his dashboard with a “Full/completed order status».
b. Notification of approval
The seller will receive an email notification when his withdrawal request is approved by the LobbyNoir team.

10 – How do I manage customer return requests (RMA)?
To manage customer RMA requests, the seller must access their seller dashboard> Return Request>

Then, the seller will have the opportunity to chat with the customer and respond to the return request. In addition, the seller can change the status of the RMA application if he wishes.
Here are the statuses:
New: when the seller receives a new RMA request from a customer.
Treatment: When the seller defines the status on Treatment, the customer will be able to display the status of RMA requests as “Treatment.”
Completed: When the RMA request is completely processed, the seller selects this option.
Rejected: The seller will select this option if they wish to reject the RMA application.
Review: The seller will select this option when the RMA application is under review.
a. Customer’s RMA option
Based on the vendor’s settings, customers can take advantage of the RMA function whilst purchasing their favourite products. Some options are set by default for customers. And for other options, they can choose their appropriate warranty duration for an additional cost set by sellers.
With regard to the type of warranty required, customers can choose the warranty term provided for an additional cost set by the sellers according to the products.
b. Ask for a warranty
Once the product is purchased by a customer, based on the seller’s adjusted RMA setting, the customer can request a replacement of the purchased product, a full or partial refund or a refund request in the form of a store credit.
11- How to manage followers?

When a customer follows a seller, it will automatically appear in the “Next” section of the seller’s dashboard.
To access the Next tab to view the customer details tracked, the seller will need to browse My Account → Seller’s Dashboard →Following.
Sellers will be able to see the name and time at which this customer followed them.
Note: The customer will not receive emails every time a seller adds a product to their store but will be informed in a single mail that the sellers they follow have stored new products in their store.
Customer view
Customers can follow sellers who access the seller’s shop when they log in.
Any customer can simply click the Follow button to follow any store.
12- How do I provide customer assistance?
To allow a customer to send questions and product-related issues, the seller must activate the display of the support button on their store page.
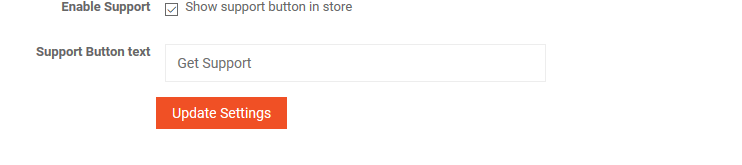
1. To do this, go to Seller’s Dashboard → Store settings →
At the bottom of the page, you’ll get two new fields:
Activate the support: you must check the box to use the store’s support function.
Text of the support button: You can change the text of the store’s support button from here.
After setting up, click the ‘Update settings’ button.
2. When the seller activates the option, a Support menu appears in the seller’s dashboard.
To view this, go to Seller’s Dashboard → Support

3. After clicking on the Support Assistance menu, sellers will be able to:
- Check all their requests for assistance under ‘All tickets’.
- Filter open and closed tickets.
- See the status and title of each ticket, customer name, order number, etc.
- Close or reopen a ticket directly from the Actions column with or without answering the ticket. This action can be done from the 3 tabs – All tickets, open tickets and close tickets.
4. To answer a customer’s ticket, simply click on the subject or title. This will open a new page.
From there, you [the seller] can write your answer to your customer in the given box.
You can also change the status of the ticket using the drop-down menu.
5. Sellers can add as many answers as they like and customers can also respond to sellers’ responses.
After adding a response, sellers can view the entire conversation, add more responses, or choose to close the ticket if they wish.
a. Open a new support section
To open a new support section, customers must access the seller shop page.
First, customers need to log into their account.
Now visit the page of your seller’s store from which you purchased. You will notice a get assistance button on the right side, under the name, description and image of the seller’s banner.
After clicking ‘Get Help’, a pop-up form will appear in which you can insert your problem or query. This contextual form will ask you to enter an object, enter your message, etc.
b. Show your existing tickets
Customers and sellers will both be able to see a new menu option on their my-account page. This button allows you to view existing support tickets.
c. Notifications
If a customer creates a new request for assistance, the seller will receive a notification email indicating that they must respond to a request for assistance containing the link to respond.
Similarly, when a seller responds to a topic, the customer will also receive a notification email indicating that they have received a response and will contain a link to view that topic.
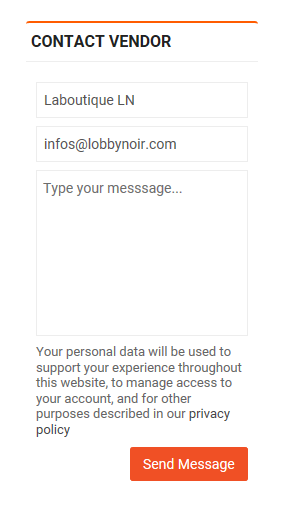
PS: If it is not a request for assistance or a ticket with a follow-up, you can also contact the seller from the contact sheet available at the bottom left of the seller’s shop page